Throughout the semester, we have had a total of 4 different assignments. We had to do an ONW procedures video, a ONW Now long project on a certain person we were assigned in our class and had to learn how to properly set up a microphone and an interview. Another project we had was to film the Blood Drive that STUCO holds every year. It was interesting for me because I do not like blood and especially not needles. When we got there I had no clue what it would look like so I freaked myself out more than I needed to be. Once we began interviewing people and getting B-Roll I was actually quite interested in the subject, not necessarily the Blood Drive, but doing live coverage of events. Our final project was an actual episode of ONW Now including a theme, many stories, a Gameday Northwest, an intro, and scripts. That was probably my favorite project by far.
Overall, my favorite project was probably the ONW Now project we just finished. This has always been my "dream" I guess, since I saw my first episode last year. When I heard that we got to produce an episode of our own, I was ecstatic. I thought it was really fun being an anchor because we got to create our own scripts and we were the people that created the tone the viewers would feel throughout the episode. It was also really complicated, however, because my partner (Mallory) and I chose the hardest story I would say because we chose Cram and Cocoa which was a story we had to film and edit the night before the package was due. When we were editing the video, we were the only ones in the classroom so it was fun to be able to not have any interruptions and to be able to do what we wanted since we really could be there for however long we wanted. While we had some problems with having to finish our whole project in one night, it was interesting to see a glimpse into what our future might hold for us.
One of the key points throughout this semester was probably having to record the Blood Drive. When I was younger I had to get my blood drawn which I had never done before so considering how much I hated needles in general beforehand, I was terrified. Once the had the needle in my arm, they couldn't seem to find my vain so for the next 15 minutes they were digging a needle into my arm which, as you can guess, hurt extremely bad. Right that instant, I knew that I would forever hate needles and blood so, when we were assigned the Blood Drive, I was not happy. When we got to the venue, I was scared because I had no idea what it would look like. Although, at the beginning, it was very nerve wracking; I got over my fear and ended up producing quite a good and informational video.
If I were to change anything to make it better, I would change my hobbies video to get more B-Roll. While I had a quality video and story line, I could definitely have more video to show over my voice-overs and interviews. My video turned out okay but it would've been a lot cleaner and better quality if I had created a longer story with more interesting video.
All together, I am going to try and get more video and manage my time better this next semester. I thought it was interesting to be able to have two different teachers who had two different ways of teaching because it taught us how to adapt to new things and create good videos the way that teacher wanted it specifically. I'm excited to see what this next semester had in store and to make amazing videos with our new teacher!
Sunday, December 20, 2015
Friday, December 18, 2015
Final Graphic Design Project


 This is my final Graphic Design project. We had to not only create a business card, but a pattern to go with it and we had to put our logo in it that we made in the past. We also had to use a picture and turn it into a postcard. On the bottom is a picture of Sydney, Australia which is where I got my name from. What I decided to do was take a picture and incorporate the name of the city which, ironically, is my name too. For my pattern, I decided to take the design elements from my logo and use it which turned out quite interesting I think. For my postcard, I chose to use one of my favorite quotes "It's about the journey, not the destination." I chose a picture of an infinite road with a sunset to add some color then created a sun from scratch for the back side of my postcard.

I loved this project because it allowed us to use all of the elements that we've used previously in other projects. We got to create a whole new pattern, use our previous logo, make type masks, and also incorporate Photoshop and Illustrator together. If I could change something I would probably add more things to my pattern like a gradient or other colors.
Friday, December 11, 2015
How To Tutorial


Thursday, December 3, 2015
Personal Edit

Masks
 Recently we have been using Photoshop to create masks in different layers whether it be type masks, color masks, or filter masks. In this first image we used a type mask to make the word look like it's made out of water.
 In the second and third pictures we used different layers and masks to make specific object different gradient colors.
In the fourth final image I created a mask and used a gradient over the whole picture. After that we had to make the center appear clearer than the rest.
Wednesday, December 2, 2015
Floating Mountain

Personal Logo

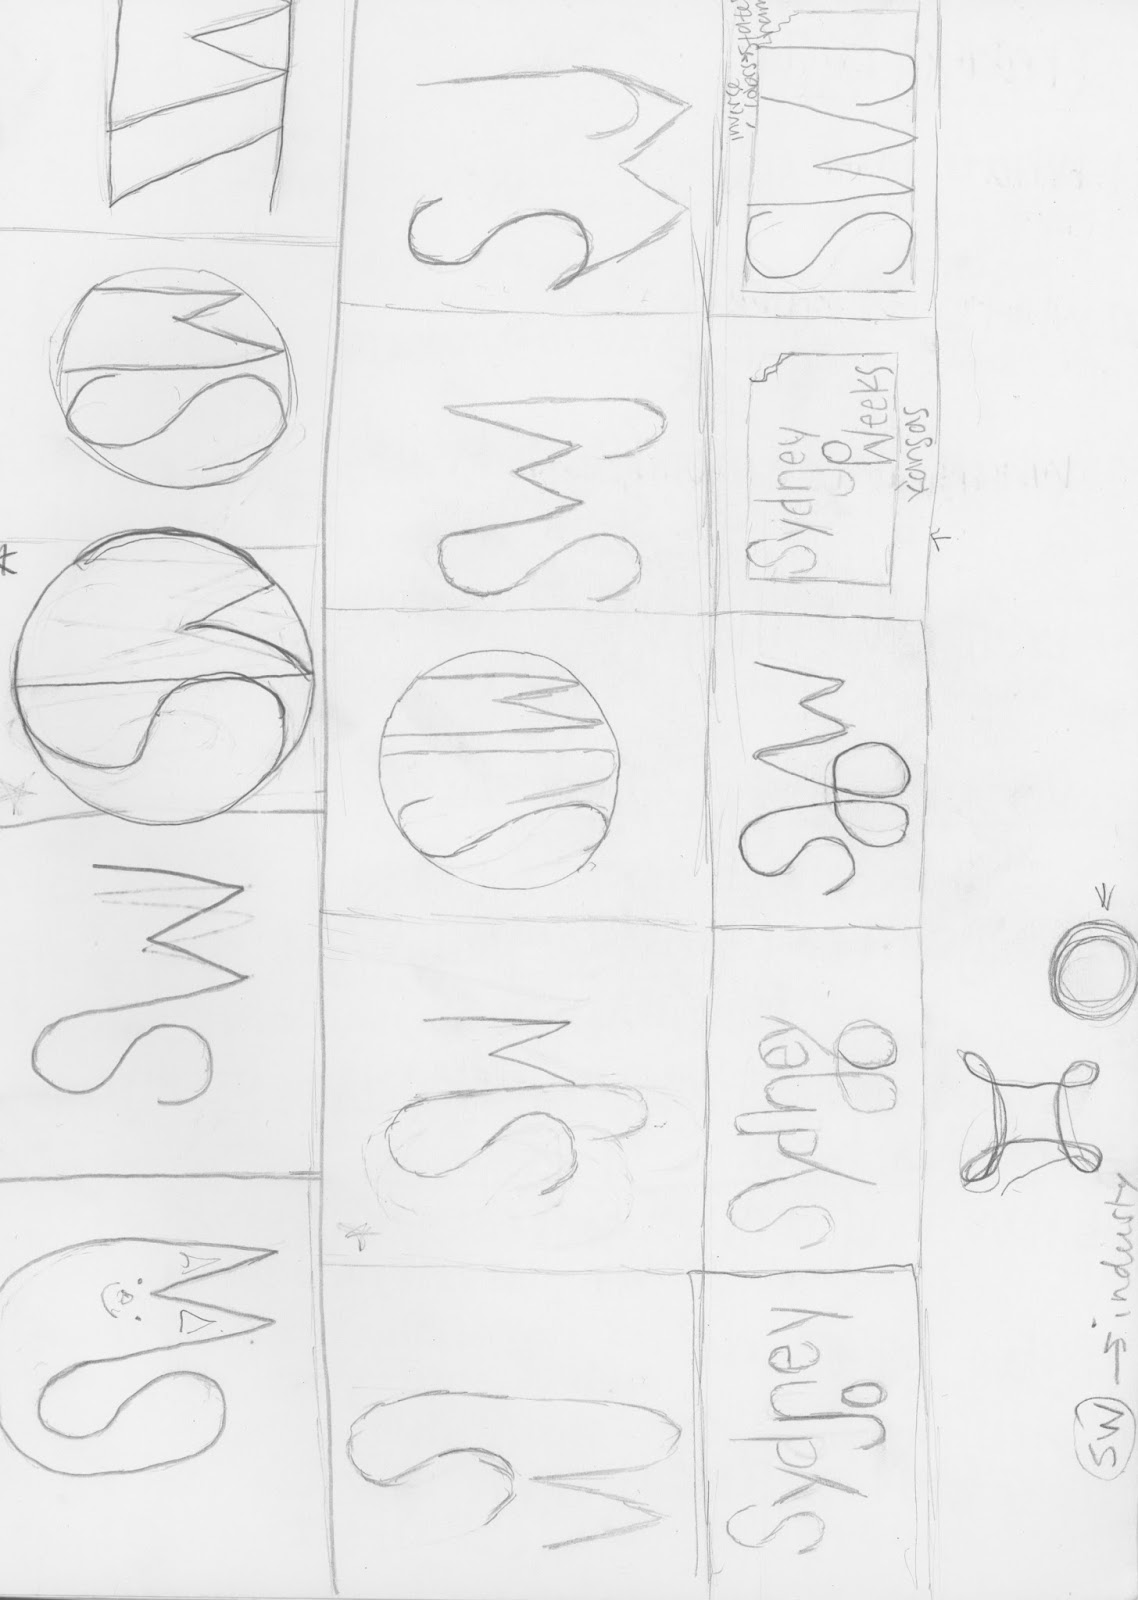


 Previously in Graphic Design we were allowed to create a personal logo that represented who we are and our personalities. While it was really fun and interesting to go through the process it was also complicated to get the shapes square and exactly where you wanted them. These pictures (in order of when created) is the thought process that I went through after I created 15 ideas for a logo.
The first thing we had to do was create 15 sketches of 3 different logos we were thinking of. After we did those we started putting our favorite ideas into Illustrator. I chose to incorporate my initials into a circle because a circle represents organization and I am a very organized person. Then I changed the colors and added design elements to make it more appealing. Once I had the shape I liked for sure, I made the colors more subtle and added a wordmark for business cards or notepads. The font that I found to use for my wordmark was Eryx Rennie Macintosh.
During this project we had to ask each other for help to see if our logo would appeal to others and I think I did a really good job about collaborating and communicating with others' and Mrs. Lofquist about things I could improve on and things that I should keep the same.
Subscribe to:
Comments (Atom)